The short answer is, “You need enough to prevent damage to your plow and your property.” Well, how many stakes is that? Here is a list of all the places it is helpful to out your snow stakes and driveway markers.
Places to put Snow Stakes:
- Drive Entryways
- Edges of drives or parking lots
- At the edges of islands in your parking lot
- Curb and sidewalk locations
- Fire Hydrants
- Items to keep clear of snow such as safety equipment.
- Retaining walls short enough to be covered by snow
- Objects sticking above the pavement
- Utility connection boxes
- Catch and drain basins
- Drop-offs near the pavement like for drainage ditches and culverts
- Sensitive plants that don’t respond well to getting buried under snow or that don’t do well with salt in the soil
The common theme of the list are items you do not want damages and items that can damage your plow of vehicle, but let’s be clear on one thing. You can stake anywhere you want as long as you are CONSISTENT, and the stakes help you PREVENT DAMAGE.
Stakes are just a communication tool to let people know where things are at that can get hidden under snow, things such as the edge of a driveway. As long as you know what the snow stakes mean and you put enough to prevent damage, you will do alright.
Snow Staking Guidelines:
- Use enough stakes to communicate where dangers can be hidden under the snow.
- Know your local laws regarding markers used at the end of a driveway. As an example, Minnesota law dictates you put reflectors 12 feet in from the edge of a roadway’s shoulder. Minnesota also recommends you avoid red or yellow reflectors next to the road.
- Use two stakes next to sensitive items. Put one stake about two feet before the sensitive object and the other about two feet after the sensitive object, so the snowplow operator has a little wiggle room as they work to keep the snow away.
- Put markers in about a foot from the edge of the pavement giving the snow room to pile up without burying or bending the stakes.
- Use stakes as “goal posts” where you want the snow to be piled as an easy indicator of a snow pile safe zone without worrying about burying or damaging the stakes. You can just “shoot for the goal” with all the snow.
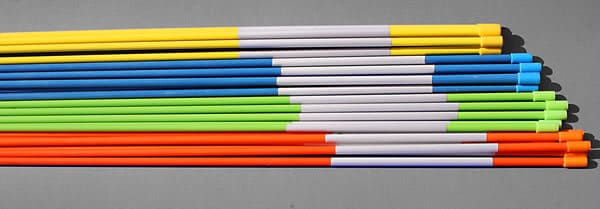
- Snow removal companies should use different colors to signify different things. When a person is on a site for the first time, they will have a color indicator as to what the specific hazard is while removing snow.
- Install stakes before the ground frost layer is thicker than 1/4 inch and before the first chance of a significant snow storm. Some areas of the country may start staking as early as October. If you have ever tried to stake late in the season, you will know it is not fun.
- Leave stakes in until the trees have pushed out their leaves. Removing stakes too early could mean you get caught without them during a late season snow storm.
- It is better to use a stake (a fiberglass rod with 360-degree reflective tape) than a marker (a stick with a reflector on it) because a reflector can spin and if the reflector gets sideways, it can become hard to see. Stakes are generally cheaper anyway.
- Resist the urge of engineering your own stake like a piece of wood with paint on it. If someone has to remove snow for you, they will not recognize it as a safety marker for snow removal. Snow stakes are so inexpensive you are better off just buying the fiberglass rods than creating your own.
- Get 5/16″ thick fiberglass snow stakes. Thinner snow stakes are more likely to break on you. Thicker stakes will be harder to insert into the ground and will leave more of a noticeable hole in the ground.
- Make sure your stakes are high enough above the ground to show above the highest likely snow accumulation. You will never see snow get near your total winter snowfall as it compacts and, in most areas, there will be times of thawing, but you DO need them visible through the entire winter!
- Take note of where you wished you put a snow stake this winter for next year. Whenever you have a new property, especially a large property, you will always find a place you wished you had staked this year. Make a map of where the stakes should go for next year BEFORE you pull them out.
- Put stakes at radiuses or curves in at least three places. Place the stakes at the beginning, end, and zenith of the curve. You may want more stakes for a large curve.
- If you have a lot of stakes, get a stake installation tool to create a proper size hole using your feet and body weight to do a majority of the work. In the long run, you will save a lot of time and energy by using a tool to create “pilot holes” for your stakes.
- For hard surfaces, such as concrete, you can drill or bore a hole and install a stake sleeve that will keep the hole open and ready for the stake from year to year.
- Buy your snow stakes in bulk from Snow & Ice Salt & Chemicals Unlimited LLC! Yes, we couldn’t resist the urge to put in that plug. We have several colors to choose from, and we can ship them to your door.